4 Early Fall Home Improvement Musts

When it’s summertime, homeowners are usually too distracted by the lure of beaches and festivals to focus on home improvement projects. By the time the fall season arrives, there’s usually a long list of things to do.     SEP 12, 2018

When it’s summertime, homeowners are usually too distracted by the lure of beaches and festivals to focus on home improvement projects. By the time the fall season arrives, there’s usually a long list of things that you want to do at your home. The pressure to fix up your house can be overwhelming, so start by focusing on these four fall home improvement musts.

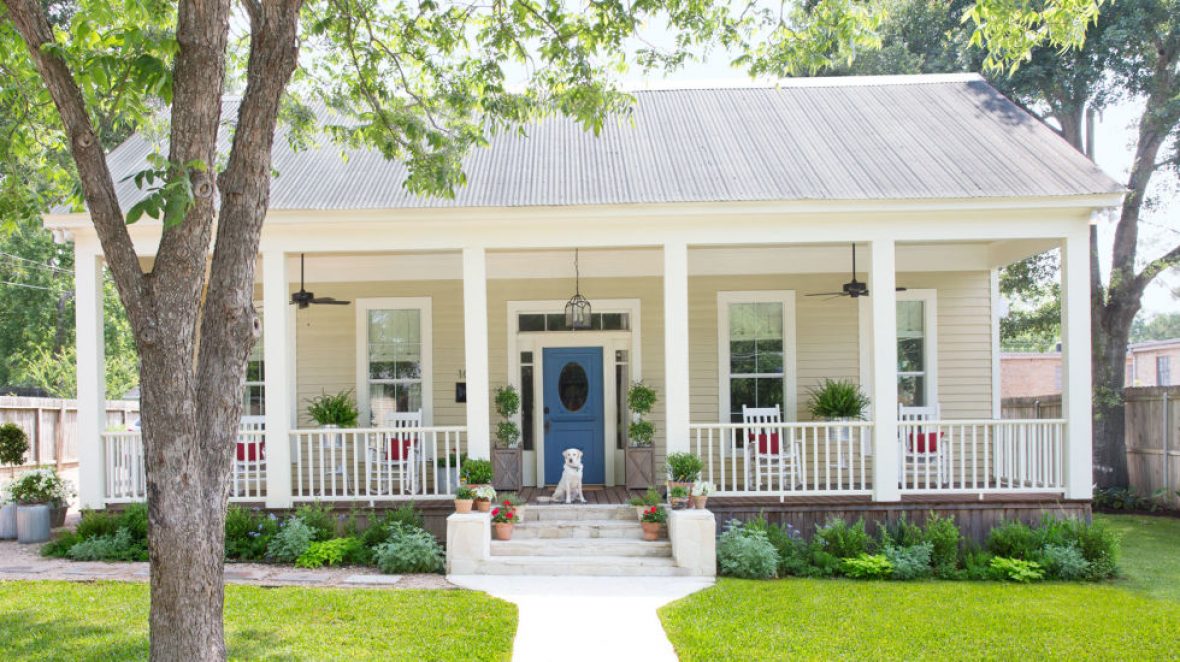
Give Your Rooms a Fresh Coat of Paint

Temperatures can reach 90 or 100 degrees in Philadelphia during the summer, so it’s usually too hot to embark on a home painting project. But when the fall season arrives, the weather gets cooler and it’s the perfect time to get some painting done. Pick out the two or three rooms in your home where you spend the most time and add a fresh coat of paint to the walls in new colors. If you have a porch that has become weathered over the summer, give it a new look with a couple of coats of exterior paint.

Home Improvement. Ladder paint can and paint roller near a wall of yellow colour. 3d illustration

New Lighting Fixtures

You probably don’t pay much attention to the condition and appearance of your lighting fixtures until you start to spend more time indoors in the fall and winter. You’ll significantly improve the appearance of your home by simply changing the lighting fixtures in your living room, dining room, and bedrooms. Get slightly brighter bulbs to brighten up your rooms. Also, remember that it starts to get dark earlier in the fall, so make sure that your outdoor lights are fully functional and the bulbs are replaced to last throughout the season.

Lighting Fixtures

Image Source: StockSnap.io

Garage or Basement Cleanup

One smart fall home improvement project to take on is a thorough garage or basement cleanup. Sweep away the grass trimmings, soil, and dirt that you may have tracked in after a long summer of yard work. Take the time to organize your tools and supplies that are in storage in boxes, drawers, and bins. Toss empty bottles and expired products. If the floor has seen better days, apply epoxy-coating — it will give your garage or basement a clean, fresh look. Also, hire someone to do a routine check of your heating system, plumbing, and other units that are located in the garage or basement before the winter.

Garage Tools

Image Source: StockSnap.io

Apply Weather Seal or Replace Old Windows

If you have old windows in your home (a common trait of Philadelphia homes that were built in the 1800s and early 20th century), apply weather seal to them to save on your energy bills. Old wooden windows often leave a crack at the bottom where cold drafts get into your house, so add adhesive weather stripping. Also, gently sand and put a fresh coat of paint on frames that look worn down. This may also be the year that you’ll want to invest in a new set of energy efficient vertical slider windows with vinyl frames to replace your old wooden ones.

Windows

Image Source: StockSnap.io

Get in gear early in the season by taking on these relatively simple but practical fall home improvement projects. They will help you to enjoy your Philly home more this fall and also save some money as you head into the winter season.

Main Image Source: StockSnap.io


How to Create an Organized Garage for Fall

These six steps will help you get your garage organized and ready for cooler weather.

The following is a guest post from Andrea Davis of HomeAdvisor


As the warm breezes of summer give way to chillier temperatures, consider rearranging the items in your garage to ensure you’re ready for colder weather. Here are six steps to help you get your garage organized and ready for fall (and winter):

Step #1 Categorize Items

It’s hard to whip your garage into shape without taking inventory. Take a look at your possessions and divide them into categories based on use. Keep frequently used and important items close at hand and store everything else. Here’s a list of items to keep close by:

  • Recycling
  • Sports and recreational equipment
  • Automotive maintenance/repair tools
  • Seasonal décor
  • Garden and yard tools
  • Major equipment

You may find that storing some of the items — like decorations — indoors will free up space and make it easier to organize your garage.

Couple Clearing Garage For Yard Sale Laughing

Step #2 Group Similar Items Together

Next, pull everything out of your garage and group similar items together. This might seem like an unnecessary step, but it can actually help you later on when you start to reorganize these items. Additionally, it’s easier to purchase storage solutions when you know the amount and size of items you’re dealing with.

Step #3 Let it Go

Whipping your garage into shape is the perfect time to identify and dispose of any unused, broken or forgotten items. If you run across any items you haven’t used in some time, throw them away or donate them to make room for your more important possessions.

Step #5 Determine a Layout

There are a number of ways to organize your garage. But, no matter how you do it, it’s best to decide on a location for each item or group of items before you start putting anything back. It’s also important to consider factors like the frequency of use and available space during this phase.

Step #6 Install Cabinets or Purchase Storage Bins

Grouping items together will help you decide on the perfect storage solution for your garage. Once you’re ready, purchase and install cabinets or storage bins. Organizational tools help you keep similar items grouped together and within easy reach. This is especially important with tools and other items that help you keep your home in good shape during the colder months.

Perhaps the most important part of the process is giving yourself time. Don’t rush yourself or assume you’ll finish everything in a single day. Set aside an entire weekend to allow yourself plenty of time to go through all of your stuff, group it, clean the garage and then put everything back in its new home. If you have to, find some friends to lend you a hand with moving items around. You’ll have a clean, organized garage before you know it.

Leslie Sells Houses

Related image

The Markets IN A MINUTE


The Market in a Minute 09 09 18


The Economy 09 09 18

Trade issues continue to help keep mortgage rates low. Talks continue between the U.S. and Canada, but tensions are escalating between the U.S. and China.
The White House Council of Economic Advisers says wages are growing faster than “traditional measures” indicate. Wage inflation can contribute to rising interest rates.
Last week, jobless claims fell to a 49-year low as private payrolls rose in August. The sustained labor market strength should continue to drive economic growth.

House News 09 09 18

CoreLogic’s Home Price Index report for July shows home prices across the U.S. rose by 6.2% year-over-year. However, home price increases are decelerating.
A recent Harvard Business School study reveals the “Starbucks Effect” on home prices. The authors say a new Starbucks raises prices by 0.5% in a ZIP code.
A Redfin survey shows recent increases in mortgage rates aren’t scaring away buyers. Only 2.6% had decided to postpone their search.

house-for-sale-650x460 WITH AGENT AND SIGN 11 03 17


Leslie Sells Houses

house-for-sale-650x460 WITH AGENT AND SIGN 11 03 17

8 Genius Ways to Organize Your Kitchen

Clear out the clutter and tidy up your kitchen with tips from our friends at HomeAdvisor

The following is a guest post from Andrea Davis of HomeAdvisor

The kitchen is one of the most difficult places in the home to keep clean and organized. Between your dishes, utensils and cooking appliances, you have lots of oddly shaped and bulky items to store. If you find yourself overwhelmed by all the stuff in your kitchen, or maybe just need a more efficient way of storing and organizing, consider these genius ways to tidy up your kitchen.

#1 Group Similar Items Together

Grouping items together according to their use is a sensible way to organize your kitchen. Categorizing similar items makes it easier for you and your guests to find things quickly.

#2 Use Baskets to Store Commonly Used Items

Searching for commonly used kitchen items is frustrating. Rather than storing them in random cabinets, use a simple wicker basket to corral and hold popular items. It looks nicer than just stacking utensils on the counter and it’s more organized than stashing them in available cabinets.

#3 Install Slide-Out Pantry Drawers

There’s nothing worse than having to pull everything out of a drawer or cabinet to reach something you’re looking for. Rather than shuffling with all of that mess, install slide-out pantry drawers or cabinets. Now, when you need a spice or are looking for specific dry goods, you can slide the entire cabinet out.

#4 Use Open Shelving

There’s nothing wrong with showing off some of the items you own, like your formal dinnerware or antique teapots. The only challenge you’ll face is keeping it all straight and tidy on your shelves. Installing an open shelving solution will help you organize everyday kitchen items and bring an open, airy energy to your kitchen. As an added benefit, you won’t have to open drawers and doors to find the items you’re looking for.

#5 Explore Alternative Storage

Traditional kitchen storage is great, but sometimes alternatives are just as functional. Consider storing extra kitchen items in wooden crates, baskets and other containers. Do you have a movable kitchen island with space underneath? Use woven baskets to hold your plates and bowls below.

#6 Don’t Waste Space

If you’re struggling to find space to organize all of your cutlery, plates and other utensils, consider high-shelf storage. Remember to only store rarely used items, like your fine china or fondue pot, on high shelves.

#7 Cut Down When Necessary

The kitchen is one of the most popular places in the home to display knick-knacks. If your assortment of collectibles has outgrown your space, the easiest way to organize is to eliminate what you can’t put out on display. This cuts down on clutter and opens up the visuals of your kitchen.

Conclusion

These are just a few simple ways to improve the organization of your kitchen. Now you can enjoy less frustrating meal preparation and less overwhelming visuals.

rwelcomed another Joe into her life as she became a mom in June 20


Leslie Sells Houses

10 Home Decor Accessories Worth Buying for Fall and Beyond

These 10 versatile pieces make great building blocks for a cozy and festive seasonal look.

Tweaking your decor each season can be a great way to keep your home feeling current and satisfy your urge to nest, without blowing your budget on big-ticket items. The problem? Each year retailers roll out tons of new seasonally inspired decor that begs to be brought home — and loading up on too much season-specific stuff is a sure way to blow your budget and overstuff your storage.

To strike the right balance, aim to build up an arsenal of go-to pieces that feel special yet can work in several different ways throughout the year, then use free and found natural objects, and inexpensive seasonal produce, to round out the different looks. The following 10 versatile pieces make great building blocks for a cozy and festive seasonal look.

1. Shiny gold stools. They can be used as seats or side tables; they are small, portable and easily stashed; and they fancy up any room. Gold looks especially festive, feels rich in fall and winter and has a sunshiny quality that makes it work in summer to boot — what more could you ask for?

South Charlotte House Family Room

2. Amber glass vessels. Vintage or new glass bottles with an amber hue look beautiful in a sunny window, lined up on a mantel or perched on a console. Clear apothecary jars are useful to have on hand too, but the great thing about colored glass containers is that they look beautiful even when empty. Of course, they look splendid filled with fall leaves or flowers, too.

Laura Zindel

3. A faux-fur throw. It’s warm and cozy, and makes any seat or bed you toss it on look incredibly luxurious. Spend enough to get a faux fur that feels really plush and has a natural-looking color; cheaper versions will fall apart over time, but a good one will hold up for many years.

Mill Valley, CA

4. Colorful accent dishes. Build a stable of solid-hued workhorse dishes in white, plus some in one or two accent colors so you can change things up. A good rule of thumb is to stick with white dinner plates but bring in fun colors and patterns with the serving pieces, bowls and salad and dessert plates.

Orange is a good hue for all of fall, from Halloween to Thanksgiving, while mint green and yellow work from spring through summer. Metallics work year-round but look especially festive around the holidays.

Fall Decor

5. Gleaming accessories. Gold and silver objects are a natural choice (see the shiny gold stools above), but the shades in between are even more versatile — think shimmering platinum, bronze and rose gold.

These subtly shimmery hues fit right in with fall leaves and acorns, look glamorous around the holidays and echo the sheen of seashells in summer. Try them with a cluster of vases, candlesticks, bowls or trays.

Willow Glen Residence

6. Fresh artwork. Your home has a finite number of walls, but does that mean you must limit yourself to the same artwork year-round? No way!

Pick up fresh artwork as you find it, without worrying if you currently have a place to hang it. At the beginning of each new season, you can simply swap out art on a few walls for a completely different look.

Parkway Kitchen

7. A tall container for branches. Having a really tall cylinder vase on hand is essential for filling with colorful foliage in the fall and budding branches in the spring, You may want to pick up a few of these — a shorter version, like the one shown here, is perfect for a tabletop; a taller vessel can be placed on the floor.

Laight Street Loft

8. Fluffy towels. A set of fresh bath towels in a seasonal palette you love is a relatively inexpensive treat, and will make a huge difference in the way your bathroom looks and feels. Try mixing and matching a solid hue with a fun pattern, as shown here. Bonus: Rotating at least some of your bath and hand towels seasonally can help reduce wear, so they’ll stay fluffy longer.

Farm Fresh Interior

9. Pillow covers. Once you have built up a nice stash of pillow covers that fit the inserts for your sofa and bed, it’s easy to give your rooms a quick makeover. Keep an eye out for sales throughout the year to find the best deal. Here are a few ideas for not-strictly-seasonal pillow covers to consider adding to your stash:

  • Burlap feed sack: great for a rustic fall and winter look, but can be used year-round
  • Sparkly, metallic hues: perfect for a festive feel
  • Velvet in rich jewel tones: for cold fall and winter nights
  • Golden yellow: can be mixed with seasonal oranges and reds in the fall, but also feels fresh in spring and summer.
Basement Development

10. Small rugs. If you have basic natural-fiber rugs or neutral carpeting, one great way to create a new look in the fall is by layering your rugs. A small Oriental rug or Moroccan-style wool rug instantly makes any space feel warmer and cozier, and goes with practically anything. Keep a few rolled up in the closet and bring them out when your feet feel like they could use a little extra TLC.

Children

Tell us: What is your favorite way to update your home for the season?

Related Reads:

Mill Valley, CA

Leslie Sells Houses

Fashion a Fall Cocoon With Fabulous Textiles
Dress Up Corners and Consoles With Fall Foliage
DIY: Make Your Own Chalkboard Paint

Header Photo Credit: Urrutia Design, original photo on Houzz

fall decorating ideas houzz


How to Make Your Move Less Stressful

Make your move less stressful by taking these steps to protect yourself and your belongings

Houzz Contributor, Laura Gaskill

From horror stories of lost, stolen and broken items to surprise charges tacked on to an already high bill, moving is not for the faint of heart. And after recently pitching in to help my mom through a downsizing and a big move, I’ve learned a few things about working with professional movers. If you have a move coming up, read on for eight tips to help your move go smoothly.

1. Take the time to research movers thoroughly. We’ve all heard horror stories about movers stealing, losing or recklessly damaging belongings, but with a bit of diligence on your part you can make sure you’re choosing a reputable, licensed company with ample experience. Check reviews, Better Business Bureau ratings and references before committing to hire. It’s also a good idea to purchase appropriate insurance for your belongings, just in case.

2. Don’t wait till the last minute to book your movers. Moving companies do book up, especially during the busy summer months, so don’t leave this decision until the last moment. Start looking for a company early and get on its schedule.

3. Honestly assess your belongings before getting a quote. If you end up bringing more items than discussed with your movers, the best-case scenario is that you get a higher bill — but the worst-case scenario is that there isn’t room on the truck for everything you plan to bring. The reverse can also be problematic: If you pare down your belongings a great deal between the time of your quote and moving day, you may find yourself paying more than you needed to.

If you do require flexibility in truck space for your move, be upfront about it. Some companies allow you to pay by the foot, which means you pay only for the space you end up using. Usually this involves sharing space with another customer, in which case your belongings will be divided with a locked partition inside the truck.

4. Don’t assume that professional packers are also pros at labeling. If you’re planning to hire professional packers, it’s smart to ask about their policy for labeling boxes. If they don’t label (surprisingly common), plan to be present while the packers work (a good idea anyway) and make it your job to label each box as it’s completed.

Packing tip: Label your boxes with your last name as well as the name of the room in your new home where you want the box to end up. When labeling rooms, use language that will make sense to the movers: Instead of “Katie’s room,” you could label a box “Upstairs small bedroom.”

5. Block out close parking in advance to avoid long-carry fees. If your movers can’t park the truck close to your home, you’ll probably get stuck with what’s known as a long-carry fee — and the farther the movers have to walk to bring each item, the longer it will take. To avoid this, do whatever you can to ensure there’s a close place to park the truck at both your old home and new. You may want to notify neighbors in advance, park your cars in the closest spaces to hold them, or put cones and signs in the space in front of your house on the day of the move.

6. Remember to measure openings at your new home. After one harrowing experience attempting to get a giant sofa through a narrow stairway (our movers eventually gave up), I now know the value of measuring doorways and stairwells in advance. If bulky furniture doesn’t fit, you may be forced to leave treasured pieces behind, or — if you simply can’t do without an item — you may need to ask for hoisting services, which aren’t cheap and may not be available right away.

7. Take the time to read the fine print. Before the movers leave at the end of the day, you’ll be asked to sign off on the inventory sheet and bill — and you’ll be exhausted when this happens. It’s easy to breeze through these last steps and just sign whatever papers they thrust in front of you, but it’s important that you take the time to actually read what you’re signing.

Double check that everything that went into the truck has actually arrived. Look over the bill carefully and be sure there are no extra charges. Especially if you were sharing space, belongings can get missed quite easily, so it’s a good idea to take a look inside the truck before it pulls away. And look close: Tiny (but necessary) items like drawer knobs and shelf brackets can easily get overlooked on the floor of a big truck.

8. Just get the big stuff into position; the rest can wait. Think rugs and major (read: heavy) furniture pieces — anything you can’t easily move on your own — are the things that should be put into position by the movers. Ideally, you’ll already be armed with a floor plan of the new space with furniture positions marked out. But if you didn’t get anything that elaborate organized, no worries. Just station yourself in the new place as early as possible before the movers arrive and make some decisions about where things will go.

Then locate the box with your bedding, because you’re going to be ready for a good night’s sleep!

Tell us: Have you moved recently? Share your tips in the Comments.

Read more stories about moving

Related reads
Get Help From Movers to Lay Down Rugs
Living Room Furniture Layouts for Your New Home
Highly Rated Moving Companies Near You

Image result for pictures of moving